How to Add and configure user on OpenVPN Access Server
How to Add and Configure Users on OpenVPN Access Server
Introduction
Virtual Private Networks (VPNs) have become essential for ensuring secure and private communication over the internet. OpenVPN Access Server is a popular solution that provides robust VPN capabilities for businesses and individuals alike. Whether you’re a system administrator or a business owner, knowing how to add and configure users on your OpenVPN Access Server is crucial for managing your VPN network effectively.
Accessing the Admin Web Interface
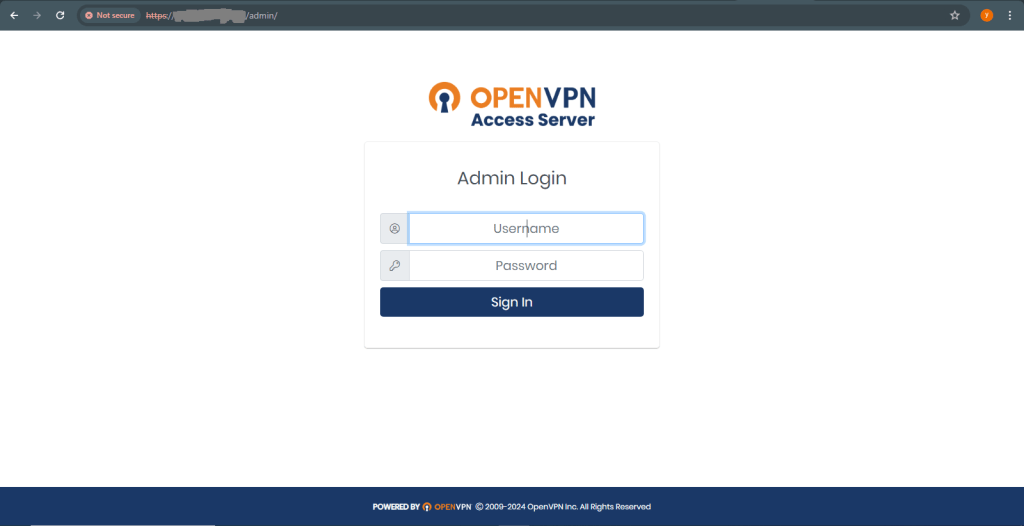
To get started, you’ll need to access the admin web interface of your OpenVPN Access Server. This is typically done via a web browser. Simply navigate to a URL that looks something like https://your-server-ip:943/admin. You’ll be prompted to log in using your admin credentials. Make sure you have these handy, as you’ll need them to proceed.
Navigating to User Management
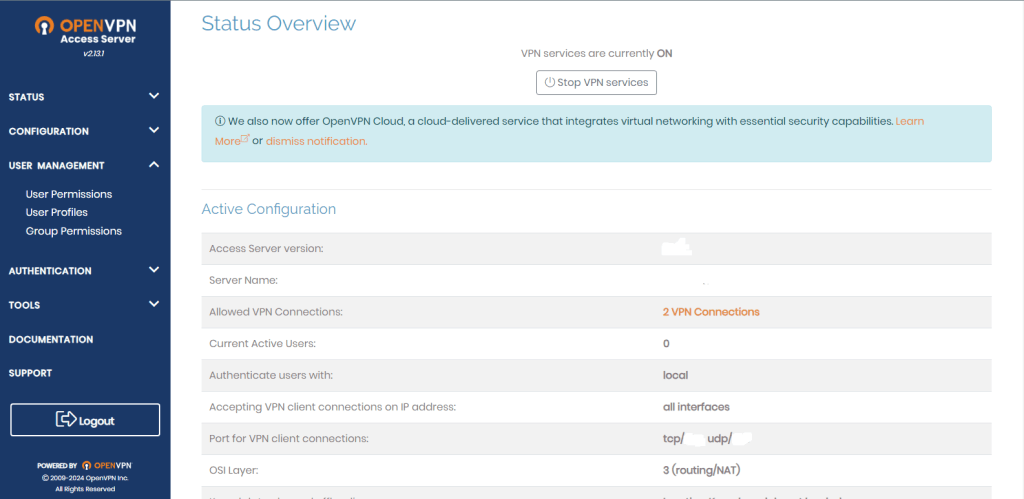
Once you’re logged in, the next step is to find the User Management section. This is where you’ll manage all user-related activities, including adding new users, modifying existing ones, and deleting accounts. The User Management section is usually easy to find, often listed in the main menu of the admin interface.
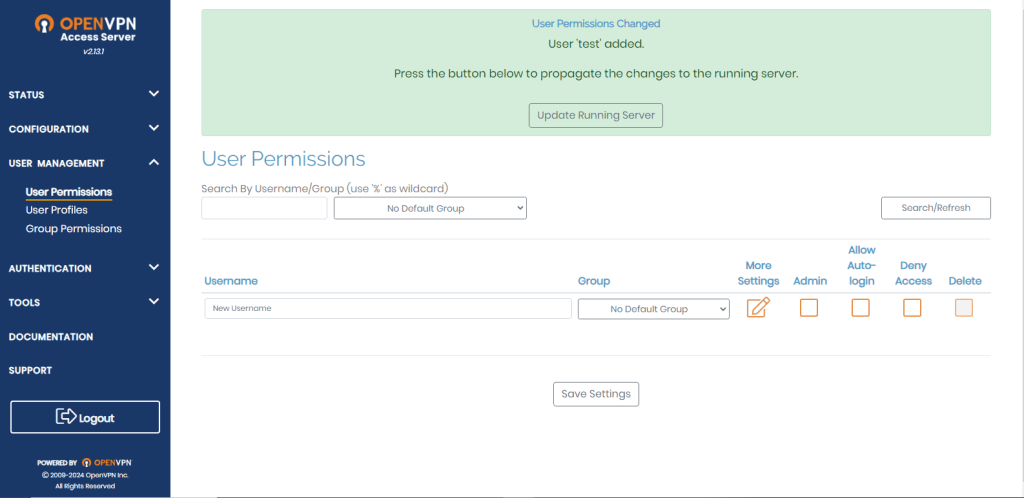
Adding a New User
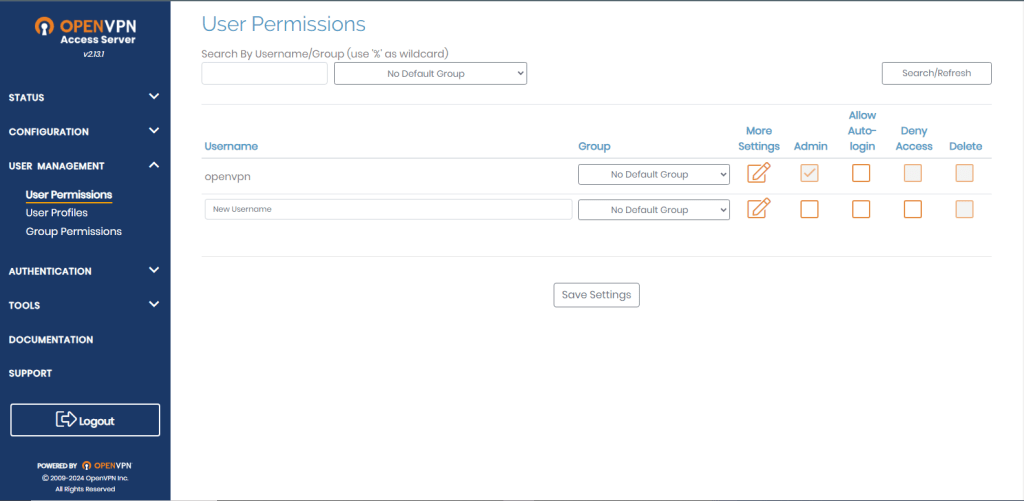
To add a new user, look for a button or link labeled “Add User” or something similar. Clicking this will bring up a form where you can enter the details of the new user.
Entering User Details
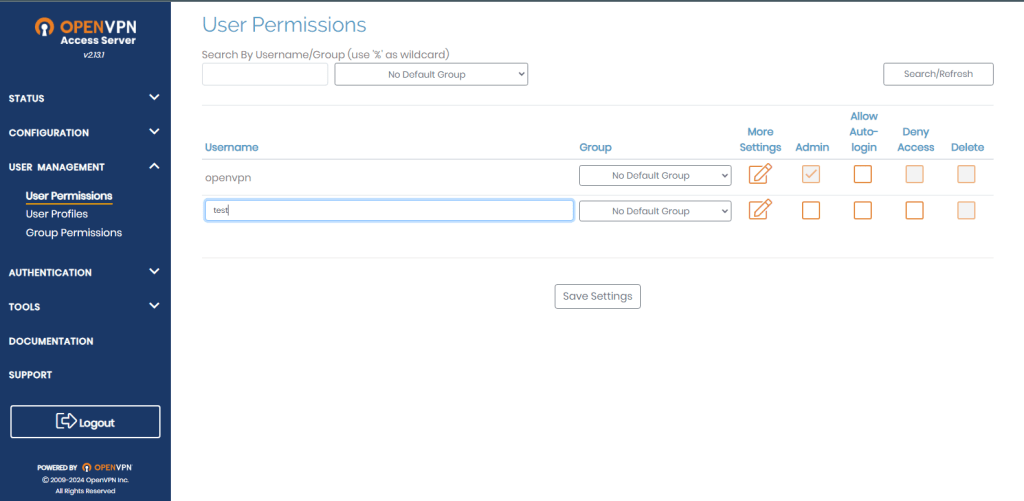
In the user details form, you’ll need to enter some basic information. This typically includes:
Username: A unique identifier for the user.
Password: A strong password for the user to log in.
Email Address: (Optional) The user’s email for communication and recovery purposes.
Configuring Access
After entering the user’s details, the next step is to configure their access rights and permissions. This includes specifying which networks or resources they can access and whether any restrictions should be applied
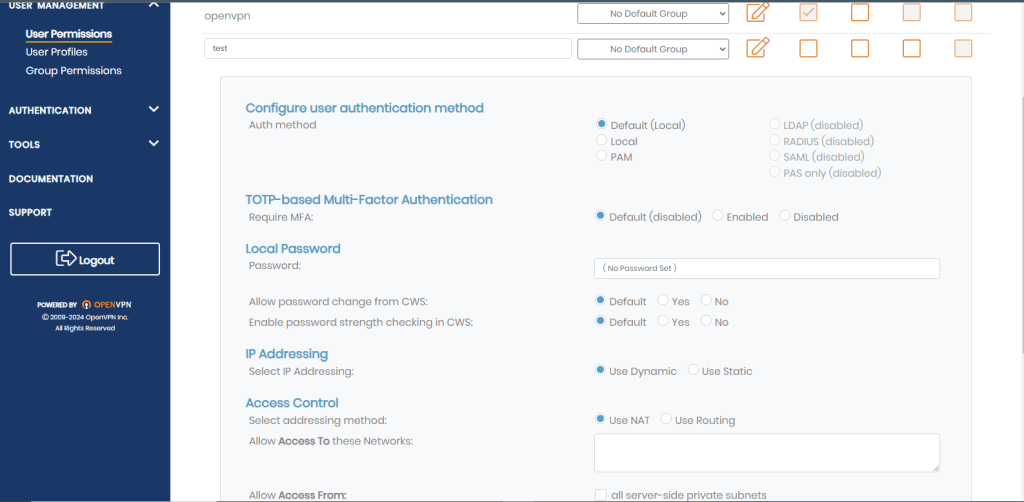
Enabling Two-Factor Authentication
For added security, consider enabling two-factor authentication (2FA) for your users. This requires users to provide a second form of verification, such as a code from a mobile app, in addition to their password. Enabling 2FA can significantly enhance the security of your VPN network.
Saving Changes
Once you’ve configured all the necessary settings, it’s crucial to save your changes. Look for a button labeled “Save” or “Apply” and click it to confirm the addition of the new user.
Distributing Configuration to Users
After adding the user, you’ll need to provide them with the necessary configuration to connect to the OpenVPN Access Server. This can be done in two ways:
Pre-configured Client Package: You can generate a client package that includes all the necessary configuration files and send it to the user.
Manual Setup Instructions: Provide step-by-step instructions for the user to set up their OpenVPN client manually.
Testing the Connection
Before distributing the configuration to the user, it’s a good idea to test the connection yourself. This ensures that everything is set up correctly and helps you identify any potential issues before the user encounters them.
Monitoring User Activity
Once users are added, you can monitor their activity through the admin interface. This includes viewing connection logs, tracking usage patterns, and identifying any suspicious activity.
Managing User Accounts
Ongoing management of user accounts is an important aspect of maintaining a secure VPN network. This includes:
Modifying Access Permissions: Adjusting what resources users can access as needed.
Resetting Passwords: Assisting users who have forgotten their passwords.
Revoking Access: Removing access for users who no longer need it or pose a security risk.
Best Practices for User Management
To ensure the security and efficiency of your VPN network, follow these best practices:
Regularly Update Passwords: Encourage users to change their passwords periodically.
Monitor for Suspicious Activity: Keep an eye on user activity and look for any signs of unauthorized access.
Common Issues and Solutions
Here are some common issues you might encounter and their solutions:
Login Problems: Ensure the user is entering the correct username and password. If they forget their password, use the password reset feature.
Access Issues: Check the user’s permissions and make sure they have access to the required resources.
Conclusion
Adding and configuring users on OpenVPN Access Server is a straightforward process that involves accessing the admin interface, navigating to the User Management section, entering user details, configuring access, and distributing configuration. By following these steps, you can effectively manage your VPN network and ensure secure communication for all users.
FAQs
Can I add multiple users at once?
Yes, OpenVPN Access Server allows batch addition of users through scripts or CSV imports.
What should I do if a user forgets their password?
Use the admin interface to reset the user’s password and communicate the new password securely.
How can I monitor user activity?
The admin interface provides logs and monitoring tools to track user connections and activity.
Is two-factor authentication mandatory?
While not mandatory, it is highly recommended for enhanced security.
Can I restrict users to specific resources?
Yes, you can configure access permissions to restrict users to specific networks or resources.