How to Install MySQL and phpMyAdmin on Ubuntu 22.04
How to Install MySQL and phpMyAdmin on Ubuntu 22.04 VPS Server
Introduction
Installing MySQL and phpMyAdmin on an Ubuntu 22.04 VPS server is crucial for managing databases efficiently and securely. This guide will walk you through each step, ensuring a smooth installation process. Whether you are a developer or a system administrator, understanding how to set up these tools on a VPS will enhance your server management capabilities.
Prerequisites
Before diving into the installation, ensure your system meets the necessary requirements:
A VPS running Ubuntu 22.04
A user account with sudo privileges
An internet connection
You can automate the installation by using a Bash script. Just run the following command:
wget https://reliablevps.net/CSI/MySql-phpMyAdmin/ubuntu22-mysql-myadmin.sh
Step-by-Step Installation Guide
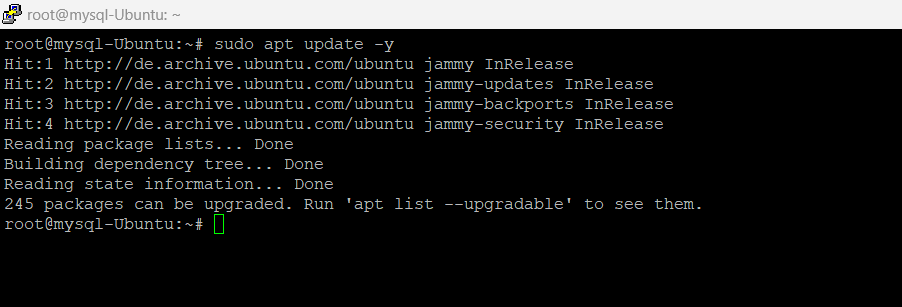
Step 1: Update the System
First, update your system’s package list to ensure you have the latest versions of the software:
sudo apt update -y
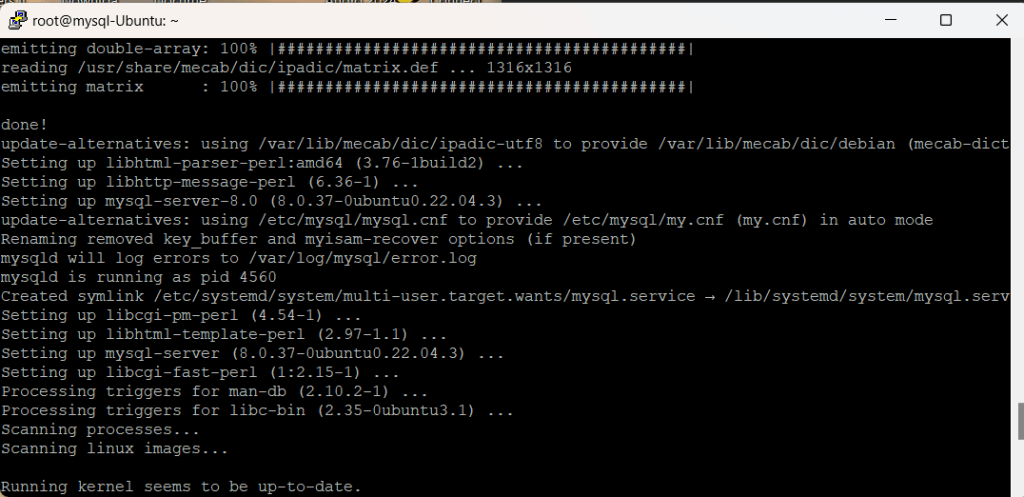
Step 2: Install MySQL Server
Install the MySQL server package:
sudo apt install mysql-server -y

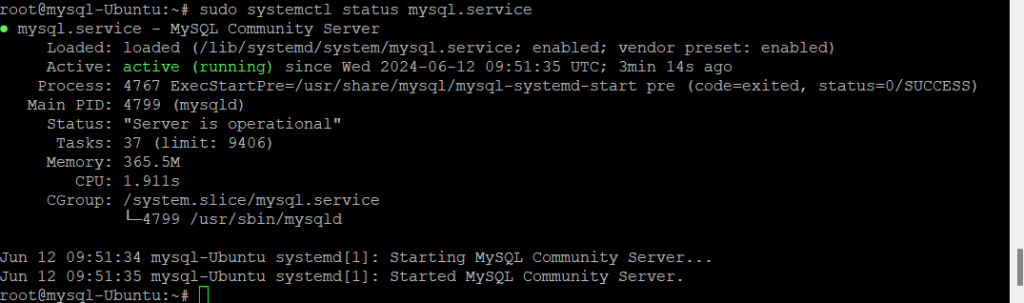
Start and enable the MySQL service:
sudo systemctl start mysql.service
sudo systemctl enable mysql.service
Check the status of the MySQL service to ensure it is running correctly:
sudo systemctl status mysql.service
Step 3: Secure MySQL Installation
Stop the MySQL service temporarily:
sudo systemctl stop mysql.service Set the environment variables for a secure MySQL installation:
sudo systemctl set-environment MYSQLD_OPTS="--skip-networking --skip-grant-tables"
Restart the MySQL service:
sudo systemctl start mysql.service

Log in to the
MySQL root account and set a new root password:
sudo mysql -u root
Execute the following commands in the MySQL prompt:
FLUSH PRIVILEGES;
USE mysql;

ALTER USER 'root'@'localhost' IDENTIFIED BY 'yourpassword';
Restart the MySQL service with the new password:
sudo systemctl restart mysql.service
Log in to MySQL with the new root password and secure the installation further:
sudo mysql -u root -p"yourpassword" Execute the following commands in the MySQL prompt to clean up the installation:
DELETE FROM mysql.user WHERE User='';DELETE FROM mysql.user WHERE User='root' AND Host NOT IN ('localhost', '127.0.0.1', '::1');
DROP DATABASE IF EXISTS test;

DELETE FROM mysql.db WHERE Db='test' OR Db='test\\_%';

FLUSH PRIVILEGES;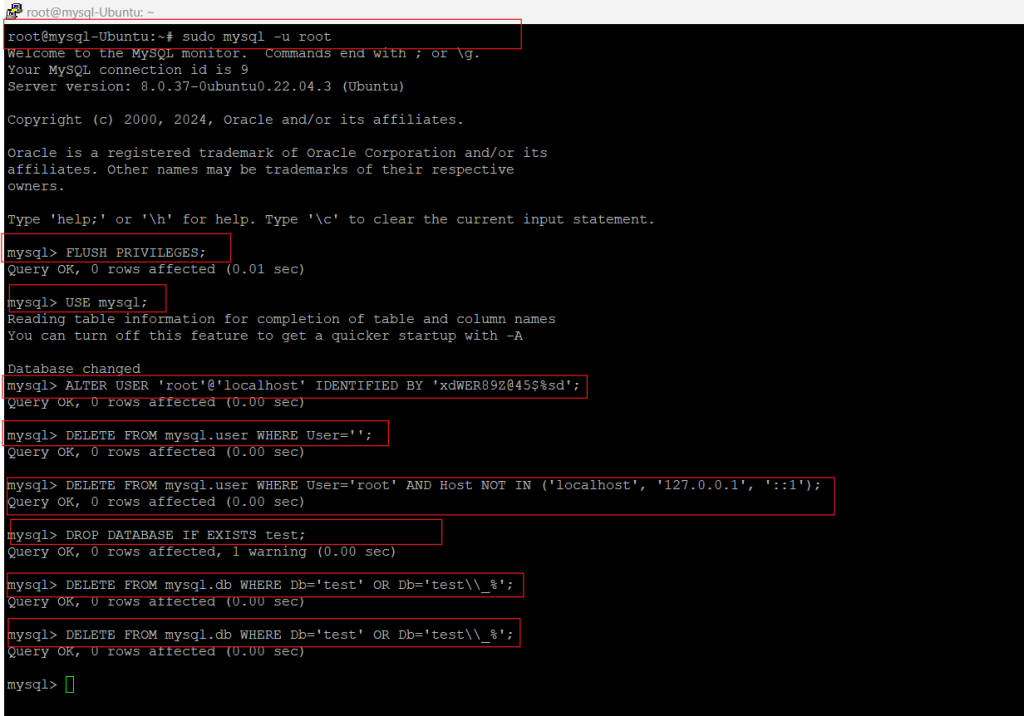
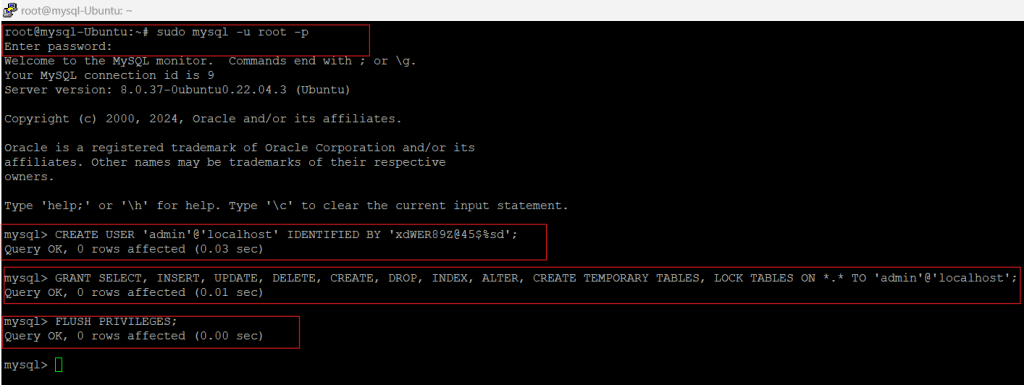
Step 4: Create a User for phpMyAdmin
Log in to MySQL as root and create a new user for phpMyAdmin:
sudo mysql -u root -p
Execute the following commands in the MySQL prompt:
CREATE USER 'admin'@'localhost' IDENTIFIED BY 'yourpassword';GRANT SELECT, INSERT, UPDATE, DELETE, CREATE, DROP, INDEX, ALTER, CREATE TEMPORARY TABLES, LOCK TABLES ON *.* TO 'admin'@'localhost';FLUSH PRIVILEGES;
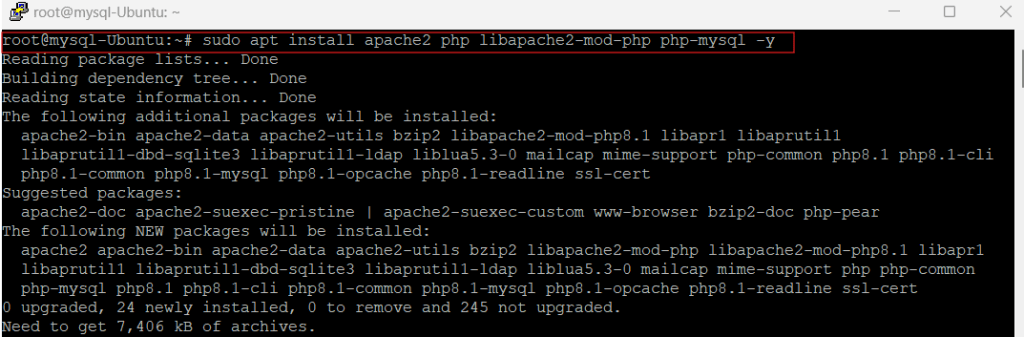
Step 5: Install Apache and PHP
Install Apache web server and PHP along with necessary modules:
sudo apt install apache2 php libapache2-mod-php php-mysql -y
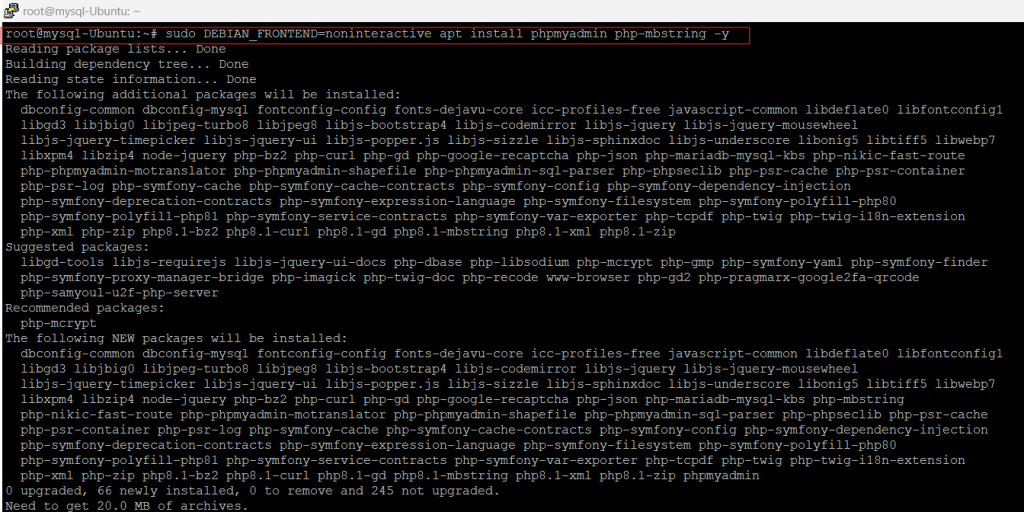
Step 6: Install phpMyAdmin
Install phpMyAdmin and PHP mbstring module:
sudo DEBIAN_FRONTEND=noninteractive apt install phpmyadmin php-mbstring -y
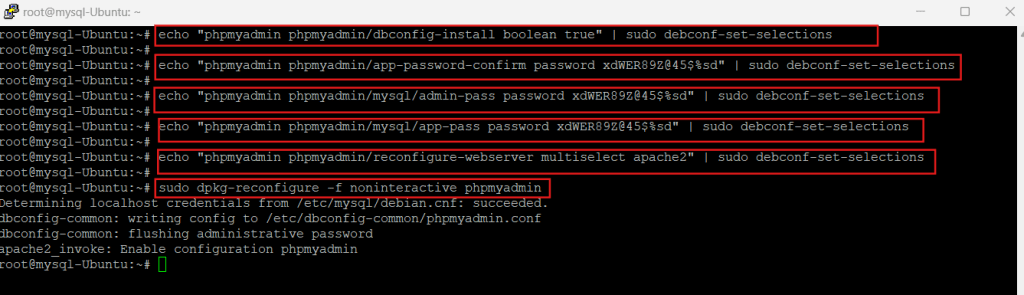
Configure phpMyAdmin using debconf-set-selections:
echo "phpmyadmin phpmyadmin/dbconfig-install boolean true" | sudo debconf-set-selections
echo "phpmyadmin phpmyadmin/app-password-confirm password yourpassword" | sudo debconf-set-selectionsecho "phpmyadmin phpmyadmin/mysql/admin-pass password yourpassword" | sudo debconf-set-selectionsecho "phpmyadmin phpmyadmin/mysql/app-pass password yourpassword" | sudo debconf-set-selectionsecho "phpmyadmin phpmyadmin/reconfigure-webserver multiselect apache2" | sudo debconf-set-selections
Reconfigure phpMyAdmin:
sudo dpkg-reconfigure -f noninteractive phpMyAdmin
Step 7: Configure Apache for phpMyAdmin
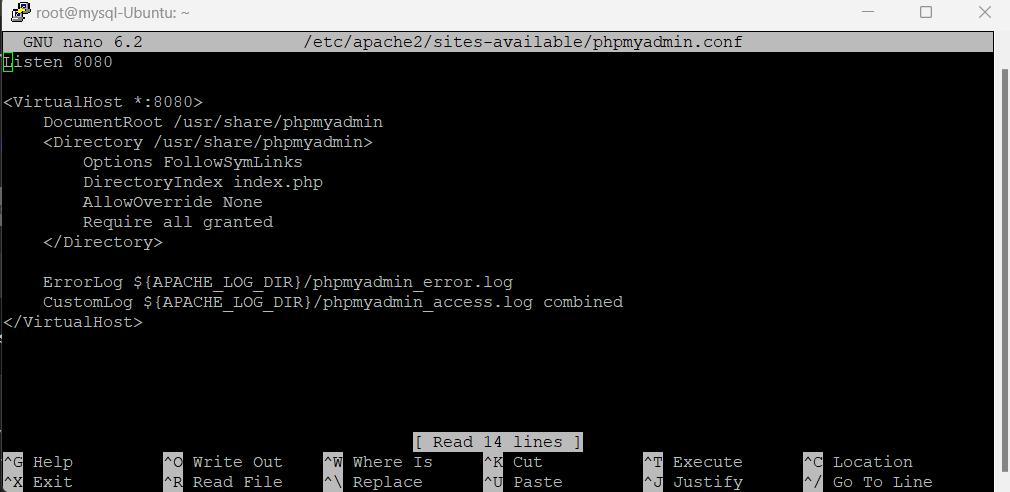
Create a new configuration file for the phpMyAdmin virtual host:
sudo nano /etc/apache2/sites-available/phpmyadmin.conf
Paste the following configuration into the file:
Listen 8080<VirtualHost *:8080> DocumentRoot /usr/share/phpmyadmin <Directory /usr/share/phpmyadmin> Options FollowSymLinks DirectoryIndex index.php AllowOverride None Require all granted </Directory>
ErrorLog ${APACHE_LOG_DIR}/phpmyadmin_error.log CustomLog ${APACHE_LOG_DIR}/phpmyadmin_access.log combined</VirtualHost>
Save and close the file by pressing CTRL+X, then Y, and Enter.
Enable the new virtual host:
sudo a2ensite phpmyadmin.conf

Restart Apache:
sudo systemctl restart apache2
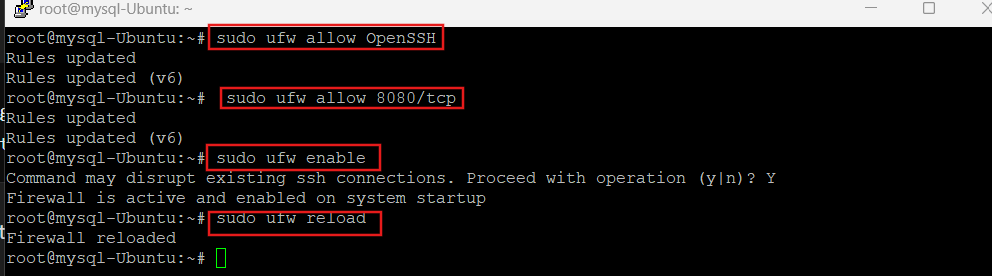
Step 8: Configure Firewall
Allow OpenSSH through the firewall and enable the firewall:
sudo ufw allow OpenSSH
sudo ufw enable
sudo ufw reload
Allow access to the specified port (replace phpmyadmin_port with your chosen port, e.g., 8080):
sudo ufw allow 8080/tcpsudo ufw reload
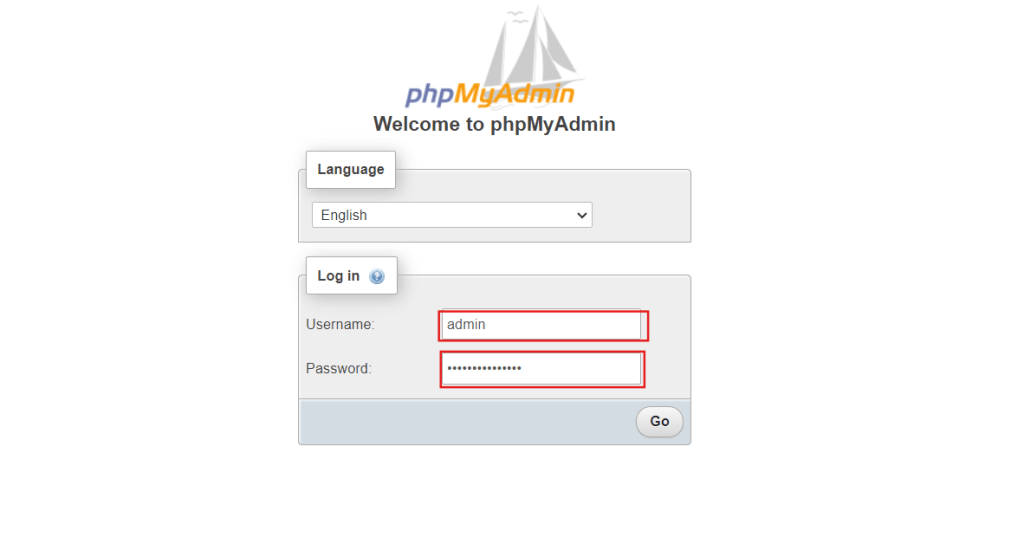
Access phpMyAdmin
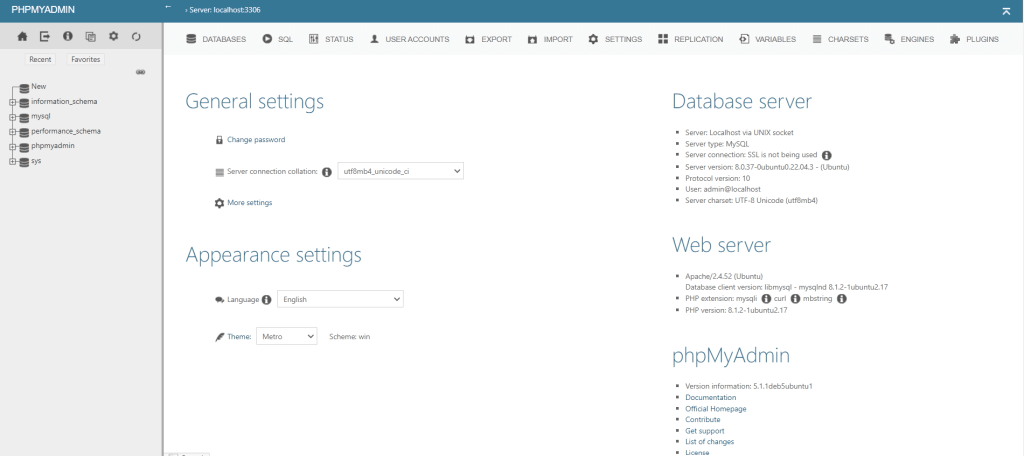
You can now access phpMyAdmin by navigating to http://your_server_ip:8080/phpmyadmin in your web browser. Replace your_server_ip with your server’s IP address.
By following these steps, you have successfully installed MySQL, configured it securely, installed phpMyAdmin, and set up Apache to serve phpMyAdmin on a custom port.
Recommended VPS packages.
Choosing the right VPS provider is crucial for ensuring the reliability and performance of your server. Here’s a comparison of some top VPS providers:
| Feature | Specification |
| CPU | 4 vCPU |
| RAM | 16 GB |
| Storage | 80 GB SSD |
| Bandwidth | 20 TB |
| Price | $12.99/month [memory optimized S16] |
| Support | 24/7 customer support, live chat, email support |
Other Top VPS Providers
| Provider | CPU | RAM | Storage | Bandwidth | Price |
| Hostinger | 4vCPU | 16GB | 200GB | 16TB | $27.99/month |
| Bluehost | 4 vCPU | 8 GB | 240GB | unmetered | $71/month |
| Hostgator | 4 vCPU | 8GB | 240GB | unmetered | $40/month |
Conclusion
By following these steps, you have successfully installed MySQL, configured it securely, installed phpMyAdmin, and set up Apache to serve phpMyAdmin on a custom port.
ReliableVPS.net offers the option to have MySQL/phpMyAdmin installed during deployment free of charge.
If you have a production environment with heavy load we recommend looking at the CPU optimized VPS packages offered by ReliableVPS to have 100% dedicated resources all the time.
FAQs
Why should I use MySQL and phpMyAdmin?
MySQL is a powerful database management system, and phpMyAdmin provides an intuitive web interface to manage it.
Can I install MySQL and phpMyAdmin on other Ubuntu versions?
Yes, the process is similar for other Ubuntu versions, though some commands may vary slightly.
What if I encounter issues during installation?
Check for typos in commands, ensure your system meets the requirements, and consult the official documentation or support forums.
Is it necessary to secure MySQL?
Yes, securing MySQL prevents unauthorized access and protects your data.
How can I access phpMyAdmin remotely?
Configure your firewall and Apache settings to allow remote access, ensuring it is secure.