
How to Install Steam in Ubuntu
How to Install Steam on Ubuntu VPS Server
Introduction
Steam, the ultimate destination for playing, discussing, and creating games, has taken the gaming world by storm. But did you know you can install Steam on an Ubuntu VPS server? Why, you ask? Well, using a VPS for Steam has its perks. It offers better control, enhanced performance, and a secure environment for all your gaming needs. Let’s dive into the process, step-by-step.
Understanding VPS
What is a Virtual Private Server (VPS)?
A Virtual Private Server, or VPS, is a virtual machine that runs its own copy of an operating system, and users have superuser-level access to that operating system instance. Think of it as having your own personal slice of a physical server, offering dedicated resources and more control compared to shared hosting.
Advantages of Using a VPS for Gaming
Using a VPS for gaming means you get dedicated resources, which translates to better performance and stability. Plus, you can customize the server environment to fit your specific gaming needs. It’s like having your own gaming fortress in the cloud.
Preparing Your Ubuntu VPS
Before you can install Steam, you need to get your Ubuntu VPS ready.
Initial Setup of Ubuntu VPS
Ensure your VPS is running Ubuntu. If you’ve just set up your VPS, it should be a clean slate, ready for some action. Update your package lists to get the latest versions of software and security updates:
sudo apt update
sudo apt upgrade
Ensuring You Have Root Access
Root access is crucial for installing software and making system-wide changes. If you’re not already the root user, you can switch to the root user by typing:
sudo -i
Enabling the Multiverse Repository
What is the Multiverse Repository?
The Multiverse repository contains software that isn’t free or open-source. Steam falls into this category, so you’ll need to enable this repository to download and install Steam.
Step 1: Enable the Multiverse Repository
First, you need to add the Multiverse repository and update your package lists:
add-apt-repository multiverse apt update
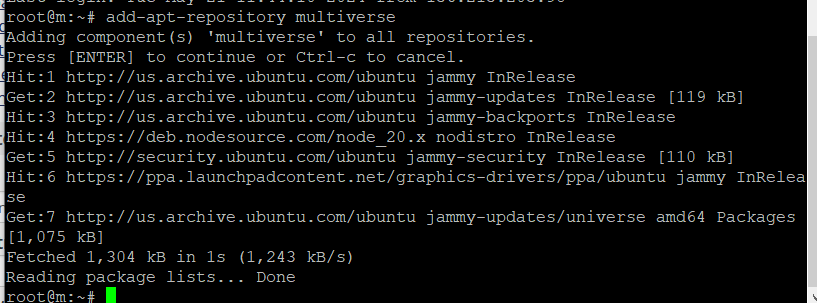
This ensures that you have access to the necessary packages.
Installing Steam on Ubuntu VPS
Why Install Steam on a VPS?
Installing Steam on a VPS is beneficial for various reasons. It allows you to manage and play games in a controlled environment, offers improved performance, and lets you handle multiple gaming sessions without the limitations of a personal PC.
Compatibility and Requirements
Ensure your VPS meets the minimum requirements for running Steam. This includes having a compatible CPU, sufficient RAM, and adequate storage.
Step 2: Install Steam
With the Multiverse repository enabled, you can now proceed to install Steam:
apt install steam
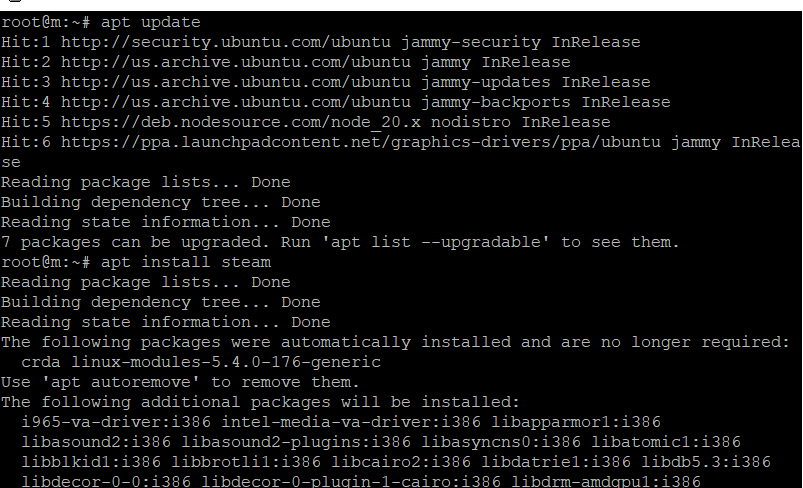
This command downloads and installs Steam along with its dependencies.
Step 3: Check steam Version

Once the installation is complete, you can launch Steam from the applications menu or by typing steam in the terminal.
Troubleshooting Common Issues
Common Installation Issues
Sometimes, things might not go as planned. You could encounter errors during the installation process.
Solutions and Fixes
If you face issues, try the following:
Ensure all dependencies are installed.
Check your internet connection.
Re-run the installation commands to resolve any missed steps.
Optimizing Steam Performance on a VPS
Tips for Better Performance
Optimizing your VPS can significantly enhance your Steam gaming experience. Here are some tips:
Allocate more resources (RAM, CPU) to your VPS.
Regularly clean up your system to free up space.
Use a fast and stable internet connection.
Adjusting VPS Settings
Tweaking your VPS settings, such as adjusting the swappiness or disabling unnecessary services, can boost performance.
Using Steam on Ubuntu VPS
How to Launch Steam
Launching Steam is straightforward. Just type:
steam
Basic Usage Tips
Familiarize yourself with the Steam interface. Browse games, join communities, and start gaming!
Maintaining Your Steam Installation
Keeping Steam Updated
Regularly update Steam to enjoy the latest features and security patches. You can do this from within the Steam client or by using terminal commands.
Regular Maintenance Tips
Perform regular system updates and cleanups to keep your VPS running smoothly. This includes removing unused packages and clearing cache files.
Security Considerations
Securing Your VPS
Security should be a priority. Use strong passwords, enable firewalls, and keep your software up-to-date.
Best Practices for Safe Gaming
Avoid downloading suspicious files and be cautious about sharing personal information. Always use secure connections.
Conclusion
Installing Steam on an Ubuntu VPS server is a game-changer. It offers a dedicated, secure, and optimized environment for all your gaming needs. By following the steps outlined, you can enjoy a seamless gaming experience on your VPS.
FAQs
Can I run all Steam games on my Ubuntu VPS?
Not all games may be compatible with Linux. Check the game’s requirements before installing.
How much RAM do I need for Steam on a VPS?
At least 2GB of RAM is recommended, but more may be required depending on the games you play.
Is it safe to use Steam on a VPS?
Yes, as long as you follow security best practices and keep your VPS and Steam client updated.
Can I host multiplayer games on my VPS?
Absolutely! A VPS is great for hosting multiplayer games, provided it has sufficient resources.
What do I do if Steam crashes on my VPS?
Restart Steam, check for updates, and ensure your VPS meets all requirements. If issues persist, consult Steam support.