
How to Install Python 3 on Ubuntu Server?
How to Install Python 3 on Ubuntu Server
Introduction
Installing Python 3 on an Ubuntu VPS server is an essential step for developers who want to leverage the power of Python for web development, automation, and various other applications. Python 3 offers numerous improvements over its predecessor, making it the preferred choice for new projects. This guide will walk you through the steps to install Python 3 on your Ubuntu server, ensuring you have a solid foundation for your development needs.
Prerequisites
Before we get started, make sure you have the following:
- A VPS server running Ubuntu
- Basic knowledge of terminal commands
- Administrative (sudo) access to the server
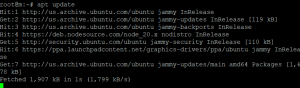
Step 1: Update Your Package List
First, it’s essential to ensure your package list is up-to-date. This ensures you’re getting the latest version of Python 3 available in the Ubuntu repositories.
Open your terminal and run the following command:
apt update
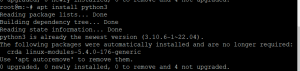
Step 2: Install Python 3
Once your package list is updated, you can proceed with the installation of Python 3. To do this, For this, enter the following command:
apt install python3
Step 3: Verify the Installation
After the installation completes, it’s a good idea to verify that Python 3 is installed correctly and to check the installed version. You can do this by running:
python3 –version

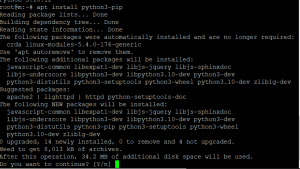
Step 4: Install Pip (Optional)
While Python comes with many useful libraries, you’ll often need additional packages. pip is the package installer for Python and can be installed with the following command:
apt install python3-pip
To confirm pip is installed, check its version:
pip3 –version
![]()
Pip is essential for managing Python packages on your VPS server. It simplifies the process of installing, upgrading, and removing packages, making your development workflow more efficient.
Common Issues and Fixes
You may run into some typical issues during the installation process.
Here are a few troubleshooting tips:
- If you get a permission denied error, ensure you are using sudo.
- If the package list update fails, check your network connection.
- If the Python version check shows an older version, try running the update and install commands again.
Advanced Python Configuration
Once Python is installed, you might want to configure it further. Setting up virtual environments is a great way to manage dependencies for different projects. You can create a virtual environment using the following commands:
apt install python3-venv
python3 -m venv myenv
Activate the virtual environment with:
source myenv/bin/activate
Managing Python Packages with Pip
Pip is a powerful tool for managing Python packages. Here are some basic commands:
- To install a package: pip3 install package-name
- To upgrade a package: pip3 install –upgrade package-name
- To remove a package: pip3 uninstall package-name
Using pip effectively can streamline your development process on your VPS server.
Security Considerations
Keeping your Python installation secure is vital. Regularly update your packages and Python itself to ensure you have the latest security patches. Here are some best practices:
- Use apt update and apt upgrade regularly.
- Avoid running scripts from untrusted sources.
- Consider using a firewall to protect your VPS server.
Integrating Python with Web Applications
Python is widely used for web development due to its simplicity and the powerful frameworks available. Django and Flask are two popular frameworks that you can use to build web applications. For example, to install Flask, use:
pip3 install flask
You can then create a simple web application by following the Flask documentation.
Automating Server Tasks with Python
Python scripts can automate various tasks on your VPS server, from backups to monitoring. Here’s an example script to clean up old log files:
python
import os
import time
log_dir = “/var/log”
now = time.time()
for filename in os.listdir(log_dir):
filepath = os.path.join(log_dir, filename)
if os.stat(filepath).st_mtime < now – 7 * 86400:
if os.path.isfile(filepath):
os.remove(filepath)
Monitoring Python Applications
Keeping an eye on your applications is essential for ensuring they stay healthy. Tools like Prometheus and Grafana can help you track the performance of your Python applications. Set up alerts to notify you of any issues, and regularly review performance metrics to optimize your applications.
Conclusion
Installing Python 3 on your Ubuntu VPS server is a straightforward process that opens up a world of possibilities for development and automation. By following the steps outlined in this guide, you can ensure a smooth installation and start leveraging Python for your projects. Whether you’re developing web applications, automating server tasks, or exploring new libraries, having Python 3 installed on your VPS server is a valuable asset.
FAQs
What is the difference between Python 2 and Python 3?
Python 3 introduced several improvements over Python 2, including better syntax, improved libraries, and enhanced performance. Python 2 is no longer supported, so it’s recommended to use Python 3.
Can I have multiple Python versions installed on my server?
Yes, you can have multiple Python versions installed. Tools like pyenv can help manage different versions and switch between them as needed.
How do I uninstall Python 3?
To uninstall Python 3, you can use the command apt remove python3. Make sure to also remove any associated packages if they are no longer needed.
Is it necessary to install pip?
While not strictly necessary, pip is highly recommended as it simplifies the process of installing and managing Python packages.
How do I update Python to the latest version?
To update Python, first update your package list with apt update, then upgrade Python with apt upgrade python3. You can also use tools like pyenv for more granular control over Python versions.
source
May 25, 2024Just wish to say your article is as astounding. The clearness
in your post is just excellent and i could assume you are an expert on this subject.
Well with your permission let me to grab your feed to keep up to date with forthcoming
post. Thanks a million and please continue the
gratifying work.