
How to Install SSH in Ubuntu Server?
How to Install SSH in Ubuntu Server
Introduction
SSH, or Secure Shell, is an essential tool for anyone managing remote servers. It allows you to securely connect to your server, execute commands, and manage files. Whether you’re using a physical machine or a virtual private server (VPS), knowing how to install and configure SSH on Ubuntu is crucial for system administrators and developers alike. This guide will walk you through the process of installing SSH on an Ubuntu server, ensuring you can securely manage your system remotely.
What is SSH?
SSH stands for Secure Shell. It’s a network protocol that provides a secure method for accessing a remote computer. SSH uses encryption to protect the data being transferred, ensuring that your communication with the server remains confidential. The primary benefits of SSH include secure data transfer, strong authentication, and secure command execution over an insecure network.
Prerequisites
Before you begin the installation process, ensure you have the following:
- An Ubuntu server (physical or VPS)
- Sudo privileges to install and configure software
- A stable internet connection
Step 1: Update Package Index
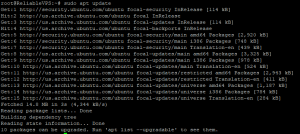
The first step in installing SSH on your Ubuntu server is to update the package index. This ensures that you have the latest information about available packages and their dependencies. Open a terminal and run the following command:
sudo apt update
Step 2: Install OpenSSH Server
OpenSSH is the most widely used implementation of SSH. To install the OpenSSH server package, run the following command in your terminal:
sudo apt install openssh-server

Step 3: Verify SSH Service
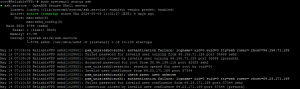
After installing OpenSSH, the SSH service should start automatically. To verify its status, use the following command:
sudo systemctl status ssh
Configuring SSH for Ubuntu Server
Now that SSH is installed, you may want to customize its configuration. The main configuration file for SSH is located at /etc/ssh/sshd_config. To edit this file, use a text editor such as nano:
sudo nano /etc/ssh/sshd_config
Here, you can adjust settings like the default SSH port, root login permissions, and authentication methods. Make sure to restart the SSH service after making changes:
sudo systemctl restart ssh
Enabling SSH on Ubuntu VPS
If you’re using a VPS, enabling SSH is especially important for remote access. The process is similar to that of a physical server. Ensure your VPS provider allows SSH connections and follow the same installation steps. If needed, consult your VPS provider’s documentation for specific instructions.
Testing SSH Connection
To ensure your SSH setup is working correctly, you should test the connection. From a client machine, use the following command to connect to your server:
ssh username@server_ip
Replace username with your actual username and server_ip with your server’s IP address. If everything is set up correctly, you’ll be prompted to enter your password and gain access to your server. If you encounter any issues, check the SSH service status and the configuration file for errors.
Securing Your SSH Server
Securing your SSH server is crucial to protect against unauthorized access. Here are some tips to enhance your SSH security:
- Disable root login by setting PermitRootLogin no in the sshd_config file.
- Change the default SSH port from 22 to something less common.
- Use SSH keys instead of passwords for authentication.
- Enable two-factor authentication for an extra layer of security.
Using SSH Keys for Authentication
SSH keys provide a more secure method of authentication compared to passwords. To generate SSH keys, use the following command on your client machine:
ssh-keygen -t rsa -b 4096 -C “[email protected]”
This command creates a public and private key pair. Copy the public key to your server using:
ssh-copy-id username@server_ip
SSH keys enhance security by eliminating the risk of brute-force attacks on your password.
Configuring Firewall for SSH
Ensure your firewall is configured to allow SSH traffic. If you’re using UFW (Uncomplicated Firewall), you can enable SSH with:
sudo ufw allow ssh
To apply the changes, reload the firewall:
sudo ufw reload
Proper firewall configuration ensures that your server is accessible only through authorized ports.
Automating SSH Setup
Automating the SSH installation and configuration process can save time, especially when managing multiple servers. Tools like Ansible or scripts written in can automate these tasks. Automation ensures consistency and reduces the risk of manual errors.
Common SSH Commands
Here are some useful SSH commands for daily use:
- ssh username@server_ip – Connect to a remote server
- scp file.txt username@server_ip:/path/to/destination – Copy files to a remote server
- ssh -L 8080:localhost:80 username@server_ip – Create an SSH tunnel
These commands help you manage files, execute commands, and set up secure tunnels efficiently.
Conclusion
Installing and configuring SSH on an Ubuntu server is a straightforward process that significantly enhances your ability to manage and secure your server remotely. By following the steps outlined in this guide, you can ensure a secure and efficient SSH setup. Remember to regularly update your server and review your SSH configuration to maintain security.
FAQs
-
How do I change the default SSH port?
- Edit the /etc/ssh/sshd_config file and change the Port directive. Restart the SSH service with sudo systemctl restart ssh.
-
What is the difference between SSH and Telnet?
- SSH is a secure protocol that encrypts data, while Telnet is an older, insecure protocol that sends data in plaintext.
-
Can I use SSH on Windows?
- Yes, you can use SSH on Windows by installing an SSH client like PuTTY or using the built-in OpenSSH client in Windows 10 and later.
-
How do I disable password authentication for SSH?
- Set PasswordAuthentication no in the sshd_config file and use SSH keys for authentication. Restart the SSH service to apply changes.
-
Why is my SSH connection timing out?
- Check your firewall settings and ensure that port 22 (or your custom SSH port) is open. Also, verify the SSH service is running on the server.