
ubuntu how to install mysql
How to Safely Install MySQL on Ubuntu: A Step-by-Step Guide
Introduction
install mysql on ubuntu
In today’s digital age, databases play a crucial role in storing and managing data effectively. MySQL, an open-source relational database management system, is widely used for various web applications and services. If you’re using Ubuntu as your operating system, installing MySQL can be a seamless process if done correctly. In this comprehensive guide, we’ll walk you through the steps to install MySQL on Ubuntu securely.
Update Package Index
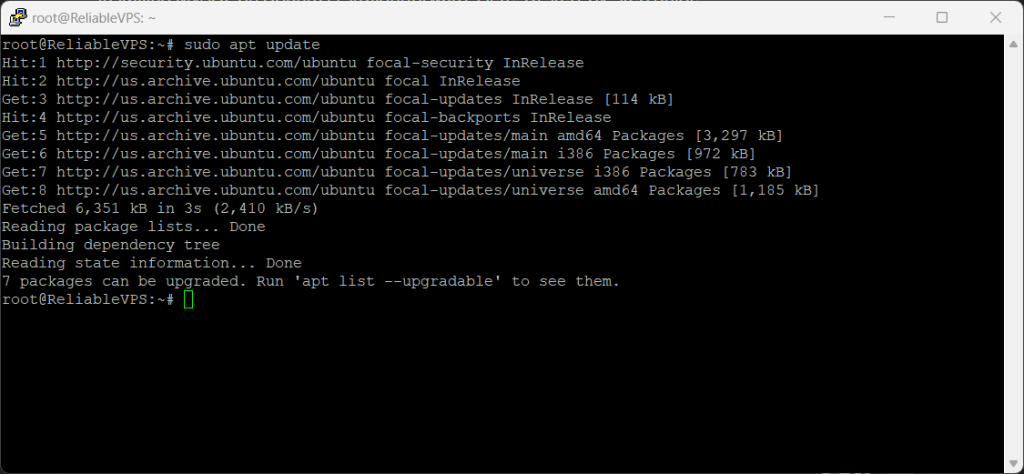
Before diving into the installation process, it’s essential to ensure that you have the latest package index. This step ensures that you install the most up-to-date version of MySQL available for Ubuntu. Open your terminal and execute the following command:
sudo apt update
Install MySQL Server
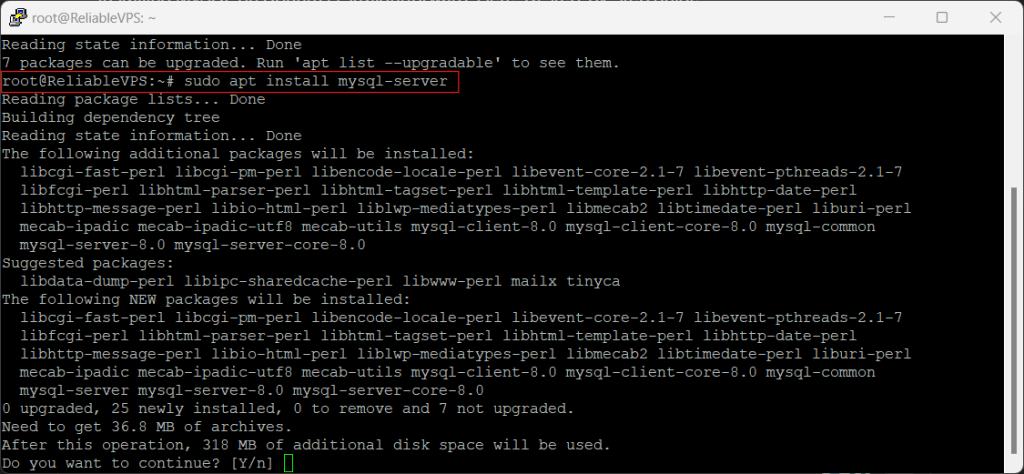
Once you’ve updated the package index, you can proceed to install the MySQL server package directly from the Ubuntu repositories. Use the following command in your terminal:
sudo apt install mysql-server
Configure MySQL
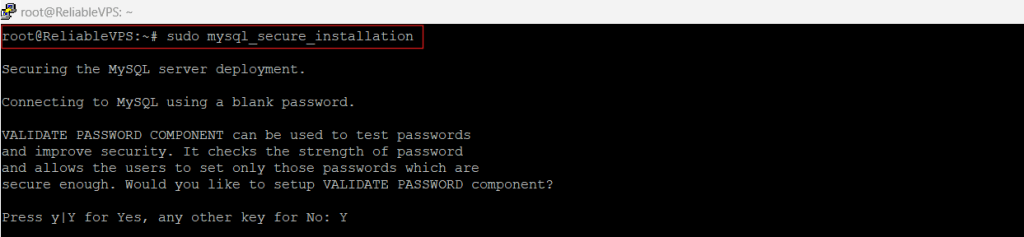
After the installation is complete, it’s crucial to configure MySQL to enhance its security. MySQL comes with a security script that aids in removing insecure default settings and setting up authentication for the root user. Execute the following command in your terminal:
sudo mysql_secure_installation
Start/Stop/Restart MySQL Server
Once MySQL is installed and configured, it should start automatically. However, there may be instances where you need to manually start, stop, or restart the MySQL server. Here’s how you can do it:
Check MySQL Service Status
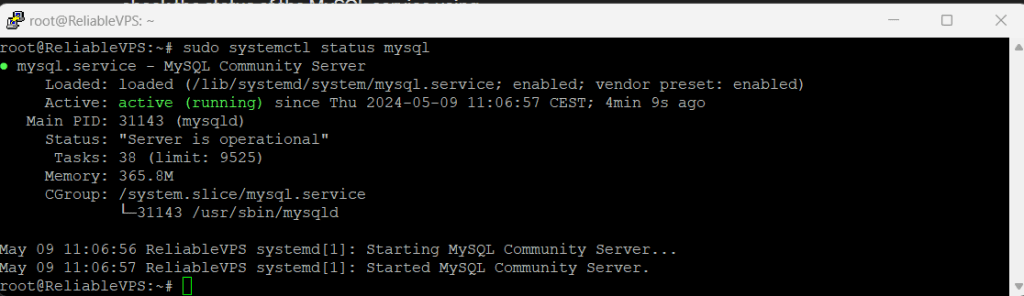
To check the status of the MySQL service, use the following command:
sudo systemctl status mysql
Start MySQL Service
If MySQL is not running for any reason, you can start it using the following command:
sudo systemctl start mysql
This command initiates the MySQL service, allowing you to access your MySQL databases and perform operations.
Stop MySQL Service
To stop the MySQL service, execute the following command:
sudo systemctl stop mysql
This command halts the MySQL service, temporarily suspending database operations until the service is started again.
Restart MySQL Service
If you need to restart the MySQL service, use the following command:
sudo systemctl restart mysql
This command stops and then starts the MySQL service, applying any configuration changes or updates made since the service was last started.
Conclusion
Installing MySQL on Ubuntu is a fundamental process for anyone looking to set up a reliable and secure database management system. By following the steps outlined in this guide, you can seamlessly install MySQL, configure it for optimal security, and manage its service effectively on your Ubuntu system.
Frequently Asked Questions (FAQs)
How do I update the package index on Ubuntu?
Updating the package index on Ubuntu is a simple process. Open your terminal and execute the command sudo apt update. This command refreshes the local database of available packages, ensuring you have access to the latest versions.
What is the purpose of the MySQL security script?
The MySQL security script helps in enhancing the security of your MySQL installation by removing insecure default settings and setting up authentication for the root user. It prompts you to configure various security options, such as setting a root password and removing test databases, to protect your MySQL instance from potential threats.
Can I configure MySQL after installation?
Yes, you can configure MySQL after installation using the sudo mysql_secure_installation command. This script allows you to adjust security settings, such as setting a root password and removing unnecessary user accounts and databases, even after the initial installation process.
How can I check the status of the MySQL service?
You can check the status of the MySQL service on Ubuntu using the command sudo systemctl status mysql. This command provides real-time information about whether MySQL is running, along with additional details like uptime and active processes.
What should I do if MySQL is not running?
If MySQL is not running for any reason, you can start it manually using the command sudo systemctl start mysql. This command initiates the MySQL service, allowing you to access your databases and perform operations as usual.
Is it necessary to restart MySQL after making configuration changes?
While not always necessary, it’s recommended to restart the MySQL service after making significant configuration changes using the command sudo systemctl restart mysql. This ensures that any changes or updates take effect immediately, preventing potential issues or inconsistencies.
https://primarytech.com
May 15, 2024Pretty nice post. I stumbled upon your weblog and wanted to say just
that I’ve really enjoyed searching your site posts. In any case
I’m going to be subscribing to your rss feed (hopefully I can find it) and I hope
you write again very soon!